Prepare your Basement for Inclement Weather: Using only a hose
Whether you already have a basement waterproofing system in place or are considering implementing one, ensuring your basement is protected from water leaks is crucial. Basement water leaks are a common issue that many homeowners face, often leading to significant damage if not addressed promptly and properly. Even with a waterproofing system, it's essential to regularly check if your sump pump and other components are functioning correctly to maintain their effectiveness. Understanding the causes and solutions for basement leaks can help homeowners protect their properties effectively. This guide provides insights into diagnosing and fixing basement leaks, drawing from expert advice and industry practices. By taking proactive steps, you can safeguard your home against the challenges posed by inclement weather.
I have a system already, what should I do?
Test Your Sump Pump
Testing your sump pump regularly is crucial to ensure it functions properly when needed, especially during heavy rains. This step-by-step guide will ensure proper functionality so you can avoid simple issues that lead to water damage:
- Check the Discharge Line (outside):
- Inspect the discharge line to ensure it is clear of obstructions and directed away from the foundation. This line carries water away from your home, so it's vital that it's functioning properly.
- Visual Inspection:
- Begin by visually inspecting the sump pump and the sump pit. Ensure the pump is upright, the power cord is plugged in, and the outlet or breaker is not tripped. Check for any visible signs of damage or debris that might obstruct the pump's operation.
- Test the Float Switch:
- The float switch activates the pump when water levels rise. To test it, use a hose or a bucket to slowly pour water into the sump pit until the float rises. The pump should turn on automatically. If it doesn't, the float switch may need adjustment or replacement.
- Check the Pump's Operation:
- Once the pump is activated, observe how it operates. It should efficiently pump water out of the pit and turn off once the water level drops. If the pump runs continuously or doesn't pump water effectively, it may need servicing or replacement.
- Battery Backup System:
- If your sump pump has a battery backup, test it by unplugging the main pumps’ power source and ensuring the back-up pump operates on battery power. This backup is crucial during power outages.
- Routine Maintenance:
- Regular maintenance is essential for the longevity of your sump pump. Clean the pump and pit periodically to remove debris and sediment that could impede performance.
I’m not sure I need a system, what should I do?
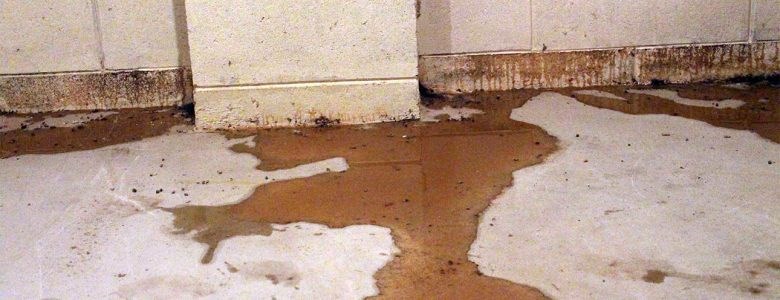
Identify the Source of Basement Leaks
Basement leaks can originate from various sources, each requiring different approaches for detection and repair. Here are some common causes and how to identify them:
- Foundation Cracks: Cracks in the foundation walls are a common entry point for water. In unfinished basements, you may be able to spot these cracks easily. You may also notice white almost chalk like powder stains. This is called efflorescence which is a residue left from water. In a basement with drywall, paneling or paint this will be much harder to identify.
- Sill Plate Leaks: If you have observed water running down your basement walls during heavy rain, it is likely that water is entering your basement over the top of the foundation. This issue is often caused by improper grading, where the ground level is higher than the top of the foundation, directing water toward the house instead of away from it. Additionally, exterior structures such as decks, sidewalks, or patios that are higher than the foundation and improperly installed can contribute to this problem.
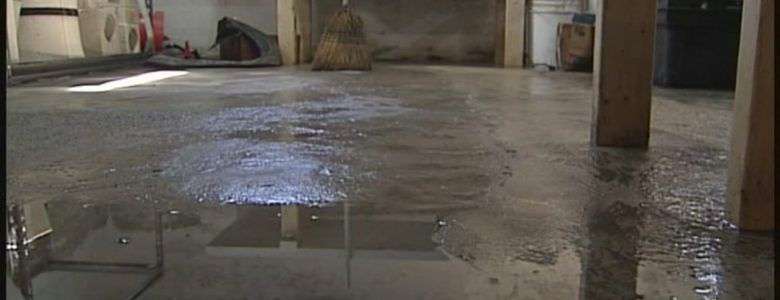
- Cove Seepage: Cove seepage is a prevalent issue in basements, occurring at the cove joint where the basement wall meets the floor. This seepage is primarily caused by hydrostatic pressure, which arises when groundwater accumulates below the level of the foundation footings. The pressure forces water upward through the cove joint, either beneath the basement floor or through the "keyway," where the foundation wall rests on the footing.
Detecting cove seepage can be challenging, as it requires thorough saturation of the soil surrounding the foundation. For accurate diagnosis, water must penetrate the soil down to the foundation footings, which may be buried eight or more feet underground. Consequently, conducting a hose test (mentioned below) to determine the source of seepage may take an hour or longer. Unfortunately, this is one of the most difficult leaks to test with a hose test, as the hose may not replicate the volume of water associated with a heavy storm.
- Hydrostatic Pressure: This involves water pressure building up under the foundation and around your foundation walls. As this pressure builds, the water beings to push on your foundation walls which can cause cracks, bowing and leaks.
How to Perform a Hose Test
Performing a hose test is an effective way to diagnose basement leaks. Here is a step-by-step guide:
- Preparation: Select a dry day to perform the test. Ensure that the basement is dry and clear of any obstructions that might obscure water entry points such as wall coverings or clutter.
- Hose Placement: Place a garden hose about 10 feet from the foundation wall. If testing for specific cracks, position the hose directly against the suspected area.
- Water Flow: Turn on the hose and allow water to flow for about 20 minutes (please note that a cove joint leak may not show up until the test is run for up to 40 minutes). This duration helps simulate heavy rainfall and allows for adequate water pressure against the foundation.
- Inspection: While the water is running, inspect the basement interior for any signs of water ingress. Pay special attention to the areas where the floor meets the walls (the cove) and any visible cracks. If you have a cinderblock foundation, check for any darkening in the cinderblocks that would indicate moisture.
- Documentation: Note any areas where water is entering. This information will be crucial for determining the appropriate waterproofing measures.
- Repeat: If necessary, move the hose to different sections of the foundation and repeat the process to ensure comprehensive coverage.
Once you have completed your checks and tests, hopefully you have found your system in perfect working order and your home free of any penetrating water. If not and you have identified a leak implementing the right waterproofing solution is crucial. Here are some recommended approaches that our foundation experts will discuss with you in more detail according to your situation:
- Gutter and Downspout Maintenance: Ensuring gutters and downspouts are clean and functional is the first line of defense against basement water issues. Downspouts should direct water at least 20 feet away from the foundation to prevent water from draining back towards the home.
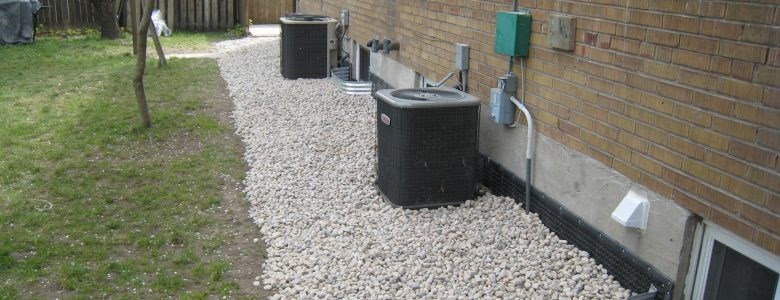
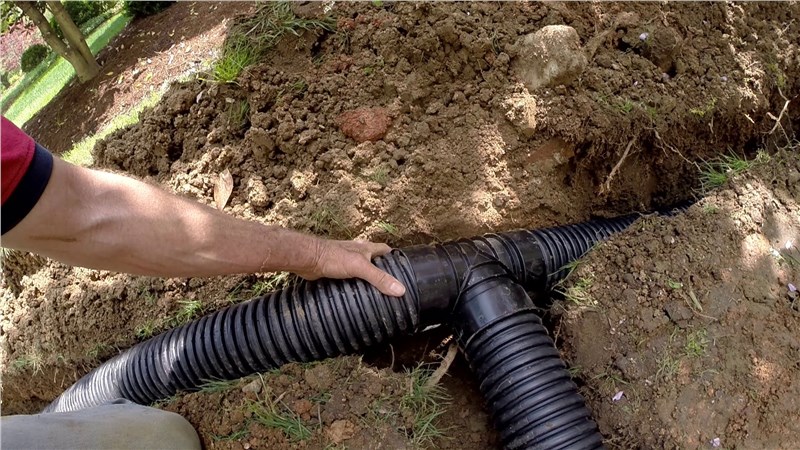
- Hydrostatic Pressure Relief Systems: Also known as French drains, these interior basement waterproofing systems used in conjunction with sump pumps will remove water entering your home before it can damage your basement.
- Sump Pumps: Installing primary and battery backup sump pumps can help manage water levels and prevent basement flooding, especially in areas prone to high groundwater levels.
- Foundation Repair: Addressing structural issues such as sinking foundations or bowing walls can prevent further water damage. This may involve stabilizing the foundation or repairing wall cracks.
- Crawlspace Encapsulation: Sealing crawl spaces can reduce humidity and prevent water ingress, thereby protecting the basement environment.
Subscribe to Worthington Waterproofing's Blog